
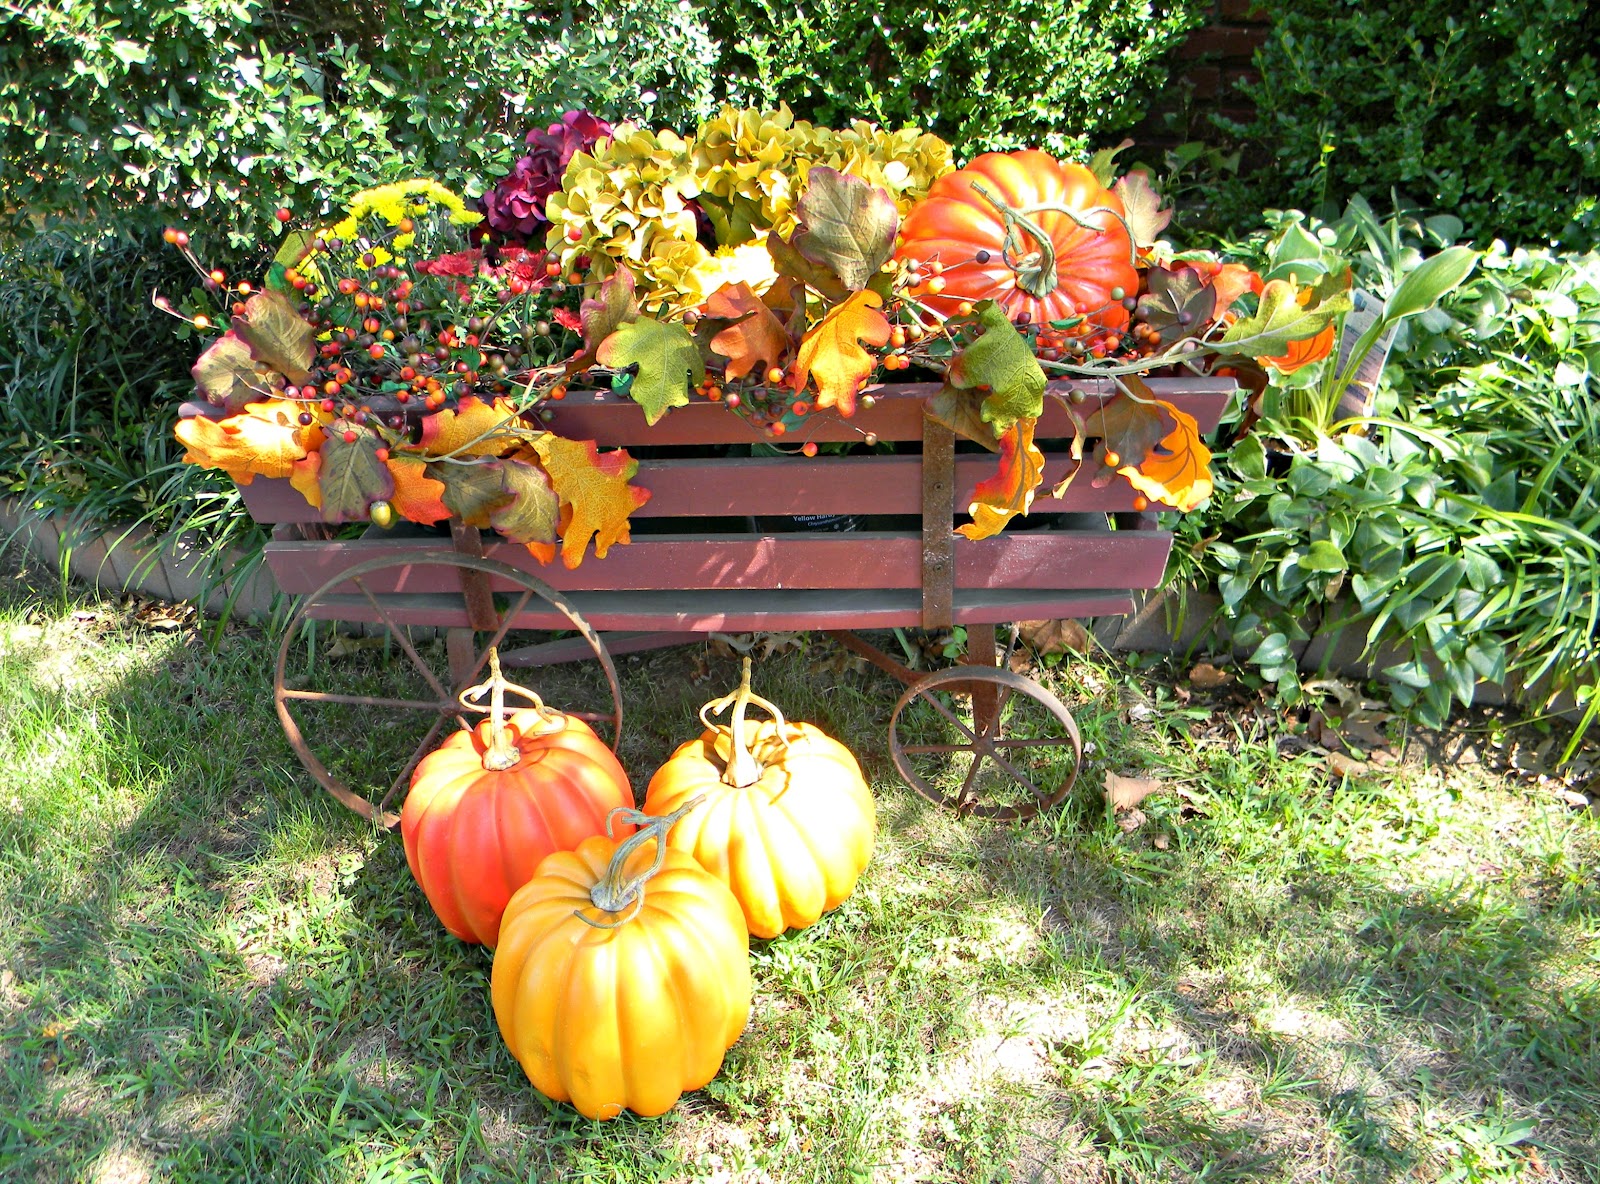
OK, I'm beginning to get into the spirit of Fall. This old wagon I've had for years and each fall, I fill it with real flowers and some not so real. I got the wagon new but use it outdoors, so it looks old from the weather.
How about a quick and easy Fall project? These are some painted flower pots I do every year. You can usually get the flower pots on sale pretty cheap.
On to the the Candy Corn and/or Pumpkin Flower Pot!!


How about a quick and easy Fall project? These are some painted flower pots I do every year. You can usually get the flower pots on sale pretty cheap.
On to the the Candy Corn and/or Pumpkin Flower Pot!!

You might want to do several at a time since you do them in the steps as follows:

These pictures and instructions are for the candy corn flower pot. I'll tell you farther down about the pumpkin one. Take a plain terra cotta flower pot (duh) and spray paint it white. I suggest you use a primer because the terra cotta clay pots really soak up the paint.
After the white paint dries, cut candy corn shapes out of Contact paper. You can buy this at the Dollar Tree. What I got was a wood grain Contact paper. Adhere the Contact paper to your white pot randomly around the sides. Make sure you have the edges down securely.
Next, spray paint the whole pot black. Spray over the Contact paper cutouts.

Next, splatter the black pot with bright orange paint. To do this, thin your acrylic paint down with water and load your brush. Then take your finger and pull back the bristles and it will cause a splatter effect. Try this on paper first until you get the hang of it.
As soon as this dries, carefully take off the Contact shapes and you have your candy corn ready to paint. The reason for this procedure is that you would never get the bright white, orange and yellow on top of the black if you painted it all black to start out with.

Carefully paint in the candy corn in a bright yellow and orange. The white undercoat serves as your white part of the candy corn.
I added a orange swirl around the top.
DONE!!
Now to the pumpkin flower pot!!

This one is so much quicker. Start out by using a sponge* and covering it in orange. Do a least two coats. Then sponge a little darker orange and dab on some yellow. No pattern - just a variation in color. The use of the sponge really helps cover up the flower pot.
* I buy 1" foam at JoAnns and cut into squares and fold them up to use in painting. This works very well and is less expensive than buying the foam brushes or pouncers.
Now, just paint a Jack-O-Lantern face on and you are done.
These are fun to do with your children and they will love it. Now, if you have your nails done, your manicurist will not like it. It really makes a mess under your nails. Oh well....
Enjoy!!
Till next time, Judy


Oh my! You do it EVERY day! You create amazing, fun things EVERY day! Here's another couple of pages in your book! I'd buy your book. Get on that will ya? I love these!
ReplyDeleteCheery wave from Bev
These pots are adorable. You should have them in your shop :) xo
ReplyDeleteVery cute! You're just one painting fool, aren't you? (Try not to sniff the fumes...)
ReplyDeleteBrenda
What a cute project. I can see them in all different sizes. I am so glad you jumped on the blogging train!
ReplyDeleteI love those flower pots, Judy! And your Autumn wagon is so beautiful!
ReplyDeleteThose are so cute! They would make cute gifts filled with candy too.
ReplyDeleteSo very cute - I especially love the pumpkin - think my grandkids would get a kick out of those.....
ReplyDeleteLove candy corn and I could not eat these:}
ReplyDeleteVery cute pots!What a fun project. Stopping by form Inspiration Friday.
ReplyDeleteWhat a talented painter you are Judy, but this tutorial makes me think that even I could do this! And if that darling cart disappears, you don't need to come looking for it over here :)) Just sayin, haha!
ReplyDeletexo, Andrea
What a neat wagon... such a pretty picture! The pots are such fun and would be such a fun family project.
ReplyDeleteThat is just tooo cute!!
ReplyDeleteThanks for the tutorial!!
That wagon is just adorable. I'll bet it is so fun to decorate for the different seasons. Cute pot project too!
ReplyDeleteCute pots and I am lovin' that wagon! What is that in the pumpkin pot? Don't think I have ever see that before, love the way it looks.
ReplyDeleteSuper cute pots, Judy! Soooo cheerful.
ReplyDeleteThe pots are so cute...Thanks for the tutorial!!!
ReplyDeleteThe wagon with the Fall decor is so pretty!!
ReplyDeleteThe pots are so cute - thanks for sharing the tutorial.
Thanks for stopping by and nice comment on the necklace. Yes - thought I would throw in a bit of Fall with the pumpkins. :-D
Have a great weekend.
These are both really cute and i just LOVE your wagon.
ReplyDeleteBlessings,
Linda
ReplyDeleteVery cute, it's amazing what a little creativity can do.
Jen @ Muddy Boot Dreams
Oh how fun, I love your painted pots. Such a cute idea with the candy corn. I enjoyed browsing around and seeing your talent for painting. Thanks for the visit. I really appreciate it. I am your newest follower. Hugs, Marty
ReplyDeleteLove the pumpkin flower pots! I can see so many uses for these adorable containers! xo's Pam
ReplyDeleteVery cute ideas!
ReplyDeleteHappy Fall!
These are pretty cute...I love the candy corn one!
ReplyDeleteLove both pot and wagon. My daughter loves candy corn and would love the pot for sure.
ReplyDeleteI am in love with your wagon! You've created such a beautiful display. It would be so fun to deck it out at Christmas, too!
ReplyDeleteCute flower pots, and I'm in love with your wagon filled with pretty Fall decor. laurie
ReplyDelete